Connect Your Messaging Platforms
Your customers are everywhere -- Telegram, WhatsApp, Instagram, Zalo, Discord, email, and your website. Instead of juggling multiple apps, connect all your channels to Converge and manage every conversation from one place. In this guide, you'll learn how to connect each platform step-by-step.
Supported Platforms
Converge integrates with the messaging platforms your customers already use. Each platform has its own connection process, but once connected, all messages flow into your unified inbox.
Telegram
Create a bot with BotFather and paste your token. Takes 2 minutes.
WhatsApp Business
Connect via Meta Business Suite with OAuth. Includes template management.

Connect your Business or Creator account via Facebook OAuth.

Messenger
Connect your Facebook Page to receive Messenger conversations.
Zalo OA
Connect your Official Account via OAuth. Includes ZBS template management.

Discord
Add a Discord bot to your server for community support channels.
Connect any mailbox over IMAP/SMTP with an app password -- Gmail, Zoho, Outlook, or custom.

Website Widget
Embed a chat widget on your website with one line of code.
More platforms coming soon: Viber, LinkedIn, LINE, WeChat, KakaoTalk, and Slack are on our roadmap.
Connecting Telegram
Telegram is one of the easiest platforms to connect. You'll create a bot using Telegram's BotFather, then paste the token into Converge. The whole process takes about 2 minutes.
Step 1: Create your Telegram bot
-
1
Open BotFather in Telegram
It's Telegram's official bot for creating other bots.
-
2
Send /newbot
BotFather asks for a display name and a username.
-
3
Choose a name and username
The username must end in "bot" (e.g., "AcmeSupportBot").
-
4
Copy the bot token
It looks like
123456789:ABCdefGHIjklMNO-pqrsTUVwxyz
Step 2: Connect in Converge
-
1
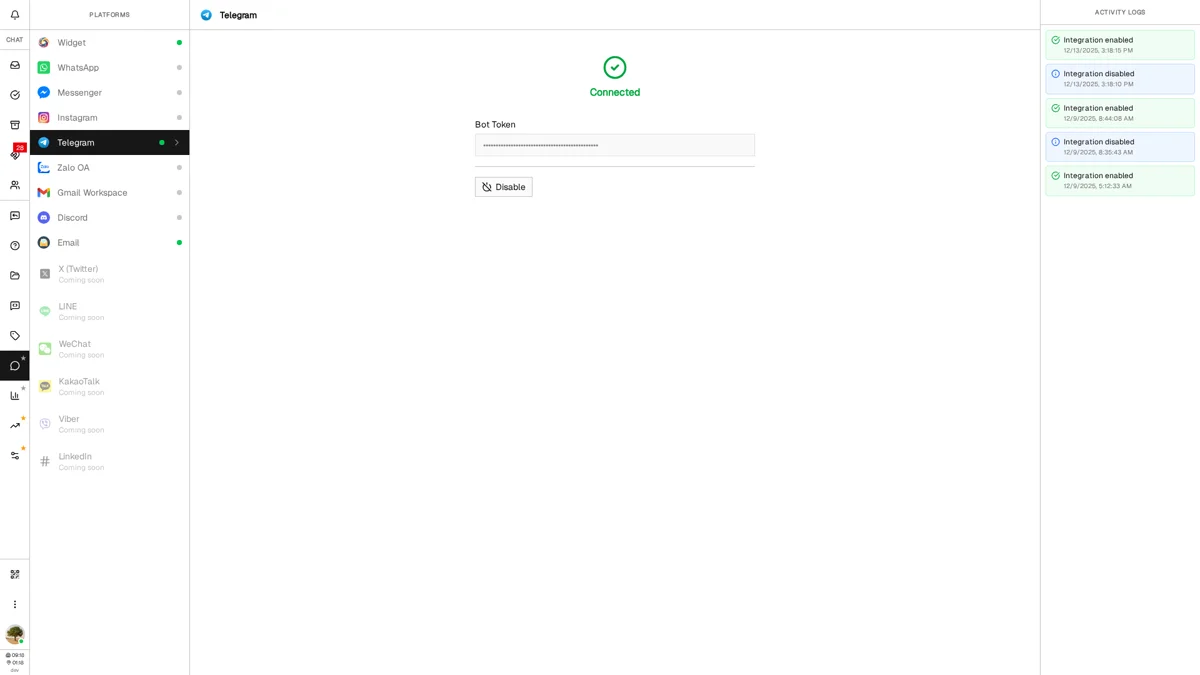
Open Platforms → Telegram
Click the Platforms icon in the sidebar, then Telegram.
-
2
Paste your bot token
Enter the BotFather token in the Bot Token field.
-
3
Click Enable
Converge verifies the token and starts receiving messages.
Connecting WhatsApp Business
WhatsApp Business uses Meta's official API, which means you connect through Meta Business Suite with OAuth. This ensures reliable delivery and access to advanced features like message templates.
Requirements
- WhatsApp Business account -- You need a business account, not a personal one
- Meta Business Suite access -- Admin access to your organization's Business Suite
- Verified phone number -- A phone number that can receive SMS or calls for verification
Connection process
-
1
Open Platforms → WhatsApp
Click "Connect WhatsApp Business" to open the Meta popup.
-
2
Log in to Meta Business Suite
Use the Facebook account with admin access to your business.
-
3
Select your WhatsApp Business account
Pick the business and phone number to connect.
-
4
Grant permissions and close the popup
The page refreshes once the connection completes.
Managing message templates
WhatsApp requires pre-approved message templates for starting conversations with customers. Once connected, you can create and manage templates directly in Converge.
Connecting Instagram & Messenger
Instagram Direct Messages and Facebook Messenger both connect through Meta's unified messaging API. The process is nearly identical -- you authenticate with Facebook and select which accounts to connect.
Instagram requirements
- Instagram Business or Creator account -- Personal accounts cannot connect
- Connected to a Facebook Page -- Your Instagram account must be linked to a Page
- Admin access to the Facebook Page -- You need to be able to grant permissions
Connection steps
-
1
Open Platforms → Instagram (or Messenger)
Click "Connect" to open the Facebook popup.
-
2
Log in to Facebook
Use the account with admin access to your Page.
-
3
Select your Page and Instagram account
Choose which accounts to connect.
-
4
Grant all requested permissions
These let Converge send and receive messages for you.
Connecting Zalo OA
Zalo Official Account (OA) connects via OAuth and includes support for ZBS (Zalo Business Service) message templates, similar to WhatsApp templates.
Requirements
- Zalo Official Account (OA) -- Create one at oa.zalo.me
- Admin access to the OA -- You need permissions to authorize third-party apps
Connection steps
-
1
Open Platforms → Zalo OA
Click "Connect Zalo Official Account" to open the Zalo popup.
-
2
Log in and authorize
Select your OA and grant the required permissions.
-
3
Close the popup
The page reloads once the connection completes.
Connecting Discord
Discord integration uses a bot that joins your server and routes DMs to your Converge inbox. You'll need to create a bot in the Discord Developer Portal. For the full walkthrough, including the Message Content intent that Discord requires before your bot can read message text, see how to connect Discord.
Setup steps
-
1
Create a Discord application
In the Discord Developer Portal, create an app and open its Bot section.
-
2
Copy the Application ID and Bot Token
The ID is on the main page; the token is under Bot.
-
3
Enter credentials in Converge
In Platforms → Discord, paste both values and click Enable.
-
4
Invite the bot to your server
Use the invite link shown on the settings page.
Connecting Email
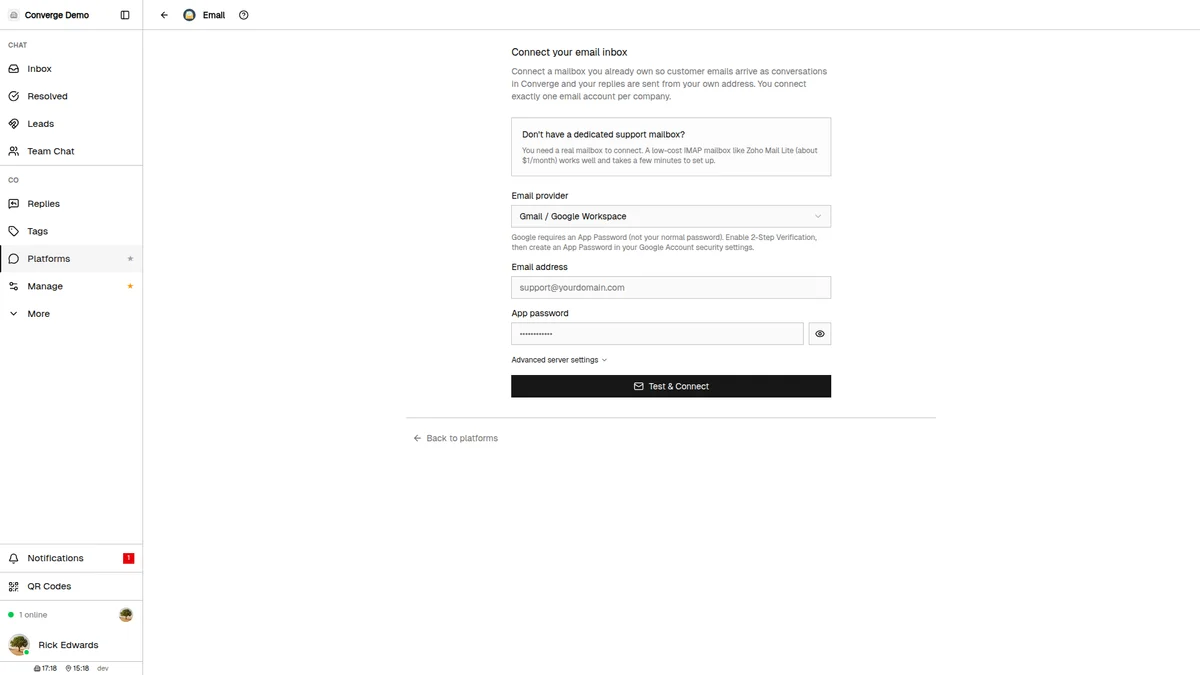
Connect your own mailbox -- like support@yourdomain.com -- over IMAP and SMTP using your own credentials. Converge reads incoming mail over IMAP and sends agent replies over SMTP, so your existing address keeps working while every message lands in your unified inbox. There are no DNS records to edit and no domain verification to wait on.
Paid plan required: Email is disabled during the 7-day free trial. Subscribe first, then connect your mailbox. One email account can be connected per company.
Setup steps
-
1
Pick your provider
In Platforms → Email, choose Gmail / Google Workspace, Zoho Mail, Outlook / Microsoft 365, or Other. Presets auto-fill the IMAP and SMTP servers; each shows an inline hint and a "Full setup guide" link.
-
2
Enter your email address
The mailbox you want to connect, e.g.,
support@yourdomain.com. -
3
Enter your password
Gmail and Outlook need an App Password (Google's app password guide, Microsoft's), not your normal login. Zoho uses an app-specific password when 2FA is on (see prerequisites). A custom host uses its mailbox or app password.
-
4
Add server details only for "Other"
Presets fill the hosts automatically; a custom host needs your IMAP and SMTP host and port.
-
5
Click Test & Connect
Converge verifies IMAP and SMTP and only enables the channel if both pass. A failure shows an inline error naming what went wrong.
Zoho Mail prerequisites
Zoho needs three things set up before it will connect, and skipping any one of them returns an authentication error:
-
1
Enable IMAP first
It's off by default. Enable it in Zoho Mail → Settings → Mail Accounts → your address → IMAP (Zoho: enable IMAP). EU and other datacenters use the same path -- Converge auto-detects the datacenter, so there's no host to type.
-
2
App-specific password if 2FA is on
A regular password won't work. Generate one in Zoho Accounts → Security → App Passwords and paste that (Zoho: app-specific password).
-
3
Paid plan required
IMAP needs Mail Lite or higher; the free tier has none.
Installing the Website Widget
The Converge widget adds a chat bubble to your website, letting visitors start conversations without leaving your page. Installation requires adding one line of code.
Setup process
-
1
Go to Platforms and select Widget
Click on "Widget" in the platforms list.
-
2
Enter your website domain
Type your domain without https:// or paths. Example:
example.com -
3
Click Enable
Converge will generate a unique API key for your widget.
-
4
Copy the script tag
Click the copy button to copy the embed code to your clipboard.
-
5
Add to your website
Paste the script tag into your website's HTML, preferably in the
<head>section.
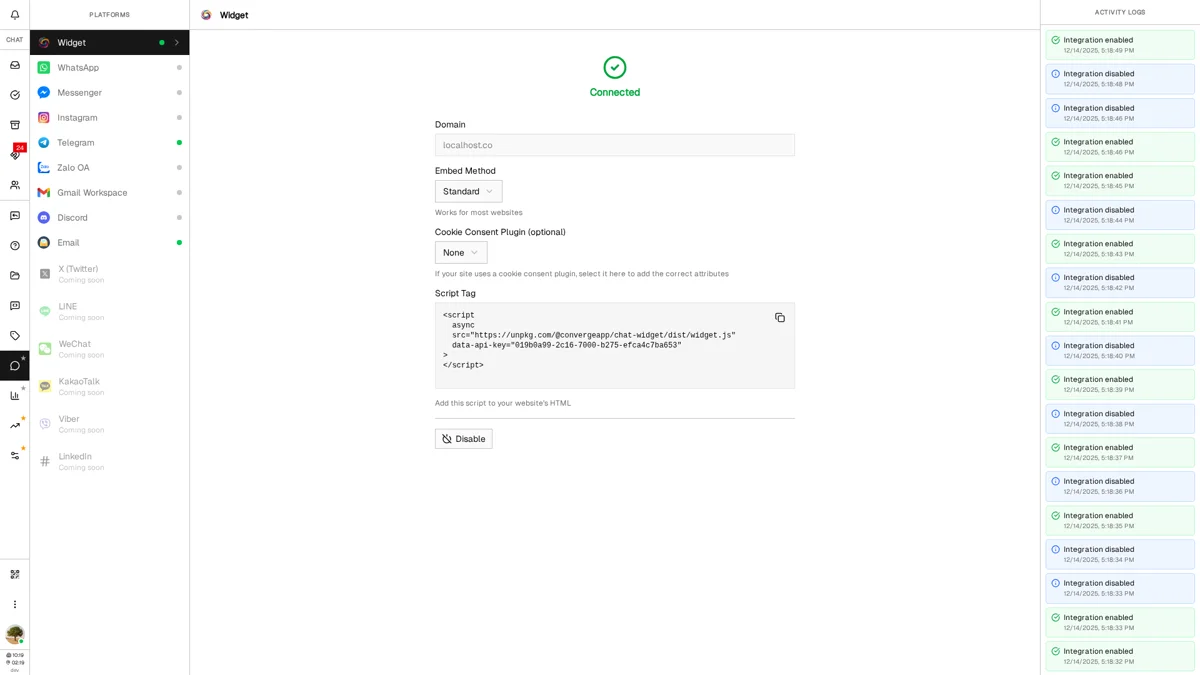
Script tag example:
<script async type="module" src="https://useconverge.app/widget.js" data-api-key="YOUR_API_KEY"></script>
Understanding Activity Logs
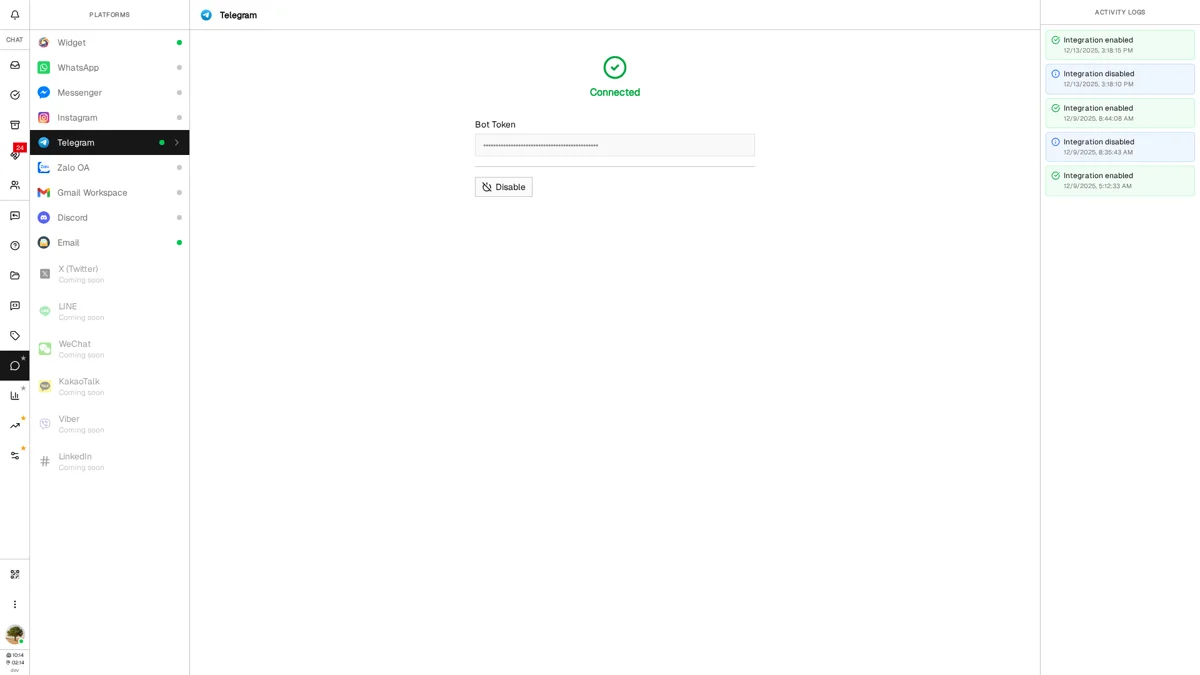
Every platform shows real-time activity logs on the right side of the settings panel. These logs help you monitor connection status, track messages, and troubleshoot issues.
Log types
Connection established, message sent successfully, webhook received
Routine status updates, incoming messages, configuration changes
Rate limits approaching, token expiring soon, temporary issues
Failed to send message, authentication error, connection lost
Logs update in real-time as events happen. If you see errors, they usually include details about what went wrong and how to fix it.
Best Practices
Start with one platform
Connect your busiest channel first. Get comfortable with the workflow before adding more platforms.
Test before going live
After connecting each platform, send yourself a test message to verify everything works correctly.
Set up Auto Replies first
Before connecting customer-facing channels, configure auto replies so new conversations get an instant response.
Monitor activity logs regularly
Check logs periodically for warnings or errors. Catching issues early prevents customer communication gaps.
Keep credentials secure
Bot tokens and API keys should never be shared publicly. If a token is compromised, regenerate it immediately.
What's Next?
Your platforms are connected. Here are some features to explore next:
- Replies Guide -- Set up Quick Replies and Auto Replies for faster responses
- Widget Guide -- Customize your website widget's appearance and behavior
- Inbox Guide -- Learn how to manage conversations from all platforms in one view
Need more help?
Our support team is here for you. Click the chat widget in the bottom right corner to start a conversation.
We typically respond within minutes during business hours.